How to Add Physical Goods
You can sell physical merchandise at Linkr Store. Some common examples of physical products chosen to sell by creators include T-shirts, hoodies, hats, mugs, organic tote bags, stickers, jewelry, knitted items, home decor, paintings, drawings, etc.
To sell physical products, you need to consider shipping services while keeping in mind the production costs, shipping fees, and possible fulfillment partners.
Follow the guide to add a physical product to Linkr Store.
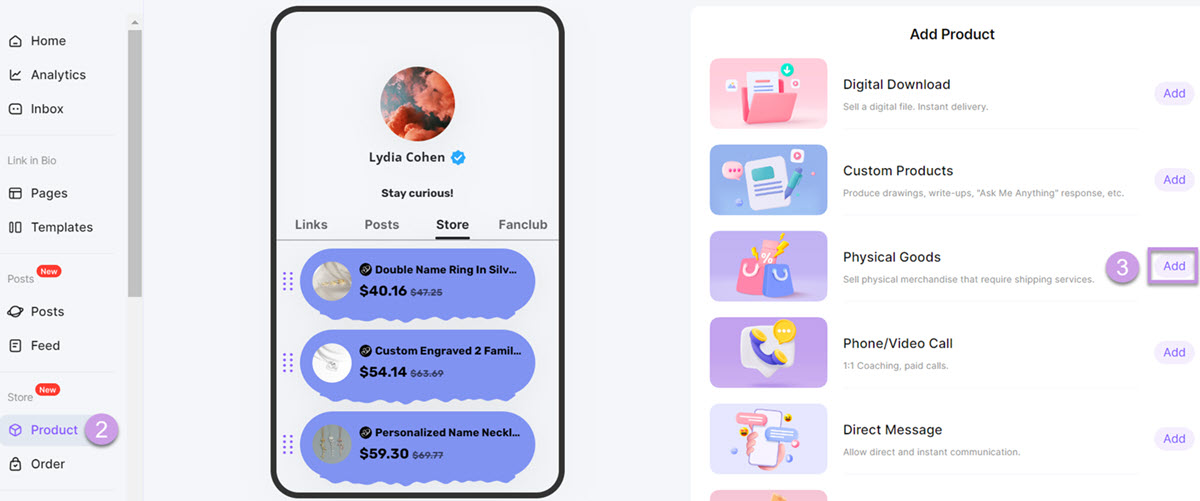
Enter Store > Product > Physical Goods:
1. Go to the Linkr website and log in to your Linkr account.
2. Navigate to the “Store” section from the left side of the screen and click “Product”.
3. Click the “Add” button to add a physical product.
Set the Thumbnail Type:
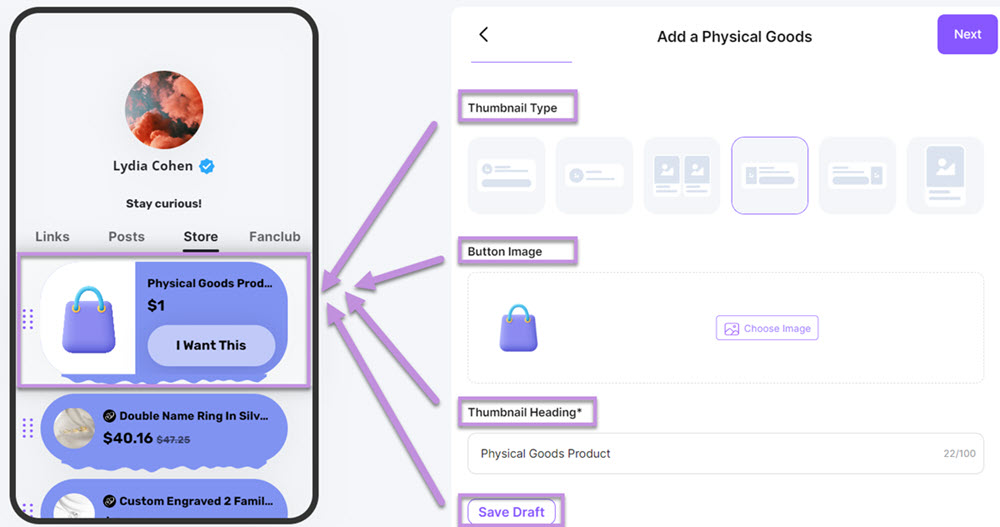
1. Enter the Thumbnail Type tab. This will generate an item on your product display page.
● Select a “Thumbnail Type”.
● Add a “Button Image”.
● Set a “Thumbnail Heading”.
2. Click the “Save Draft” button and the product will be displayed in your store.
Edit the Checkout Page:
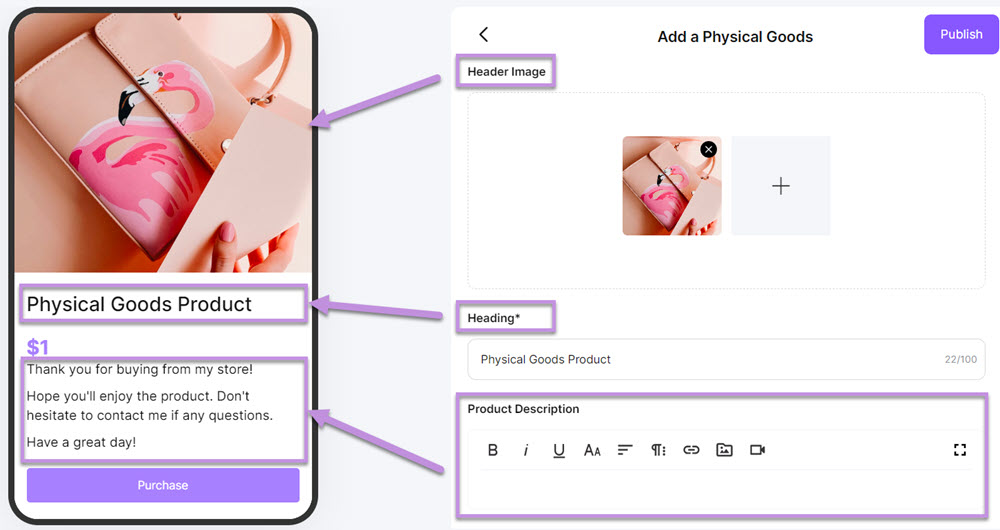
1. Click and enter the Checkout Page, which is the product detail page.
● Enter the “Product Name” you want to bundle together.
● Set a “Heading”.
● Add a “Product Description”.
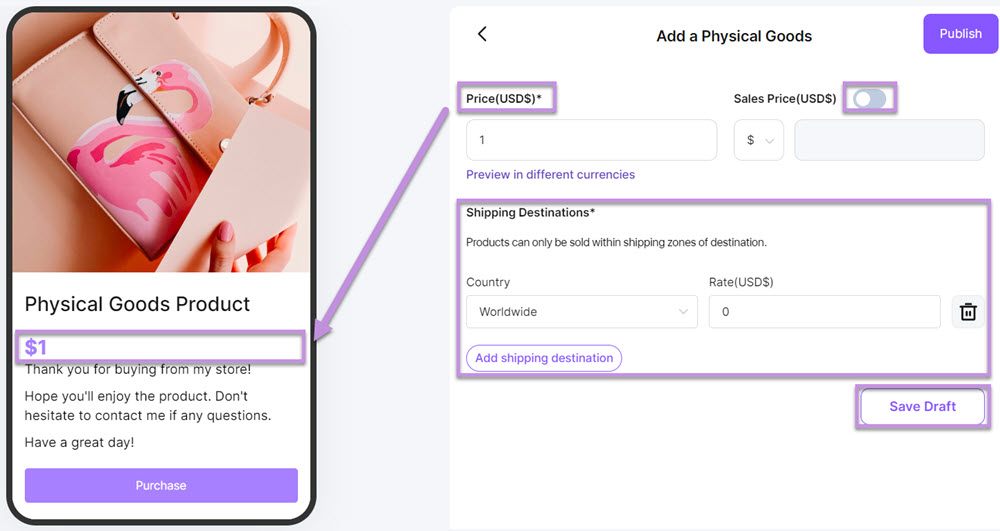
● Set a “Price(USD$)” for your product. Enable the Sales Price for promotion. You can offer a lower price or a discount.
● Add the “Shipping Destinations”. Products can only be sold within shipping zones of the destination.
2. Click the “Save Draft” button.
Complete the Advanced setting:
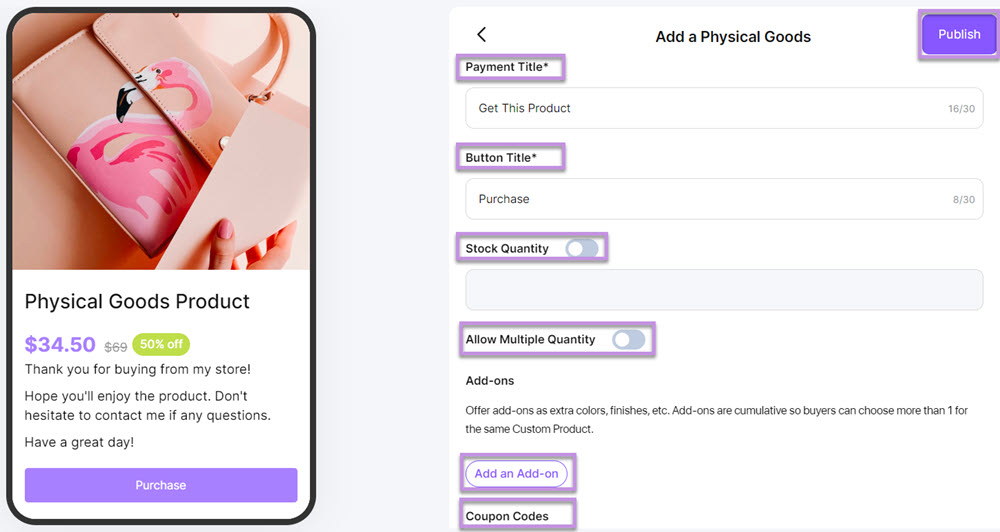
1. Enter the Advanced settings tab. This will be displayed on the payment page of a product.
● Set a “Payment Title”.
● Add a “Button Title”.
● Enter the “Stock Quantity”.
● Enable “Allow Multiple Quantity” in case your customers want to place an order for multiple items.
● Add an “Add-on”. You can offer add-ons such as extra colors, finishes, etc. Add-ons are cumulative, so buyers can choose more than 1 for the same product.
● Add “Coupon Codes”. Here you can add coupon codes for your customers.
2. Finally, click the “Save Draft” button.
3. After setting up all the settings, click “Publish” to create your product.
