How to Add Personalized Products
Personalized products can be custom illustrations, write-ups, “Ask Me Anything” responses, phone/video calls for 1:1 coaching, direct messages to send happy birthday wishes, etc.
Here we take Phone/Video Call to show you how to add a personalized product to Linkr Store.
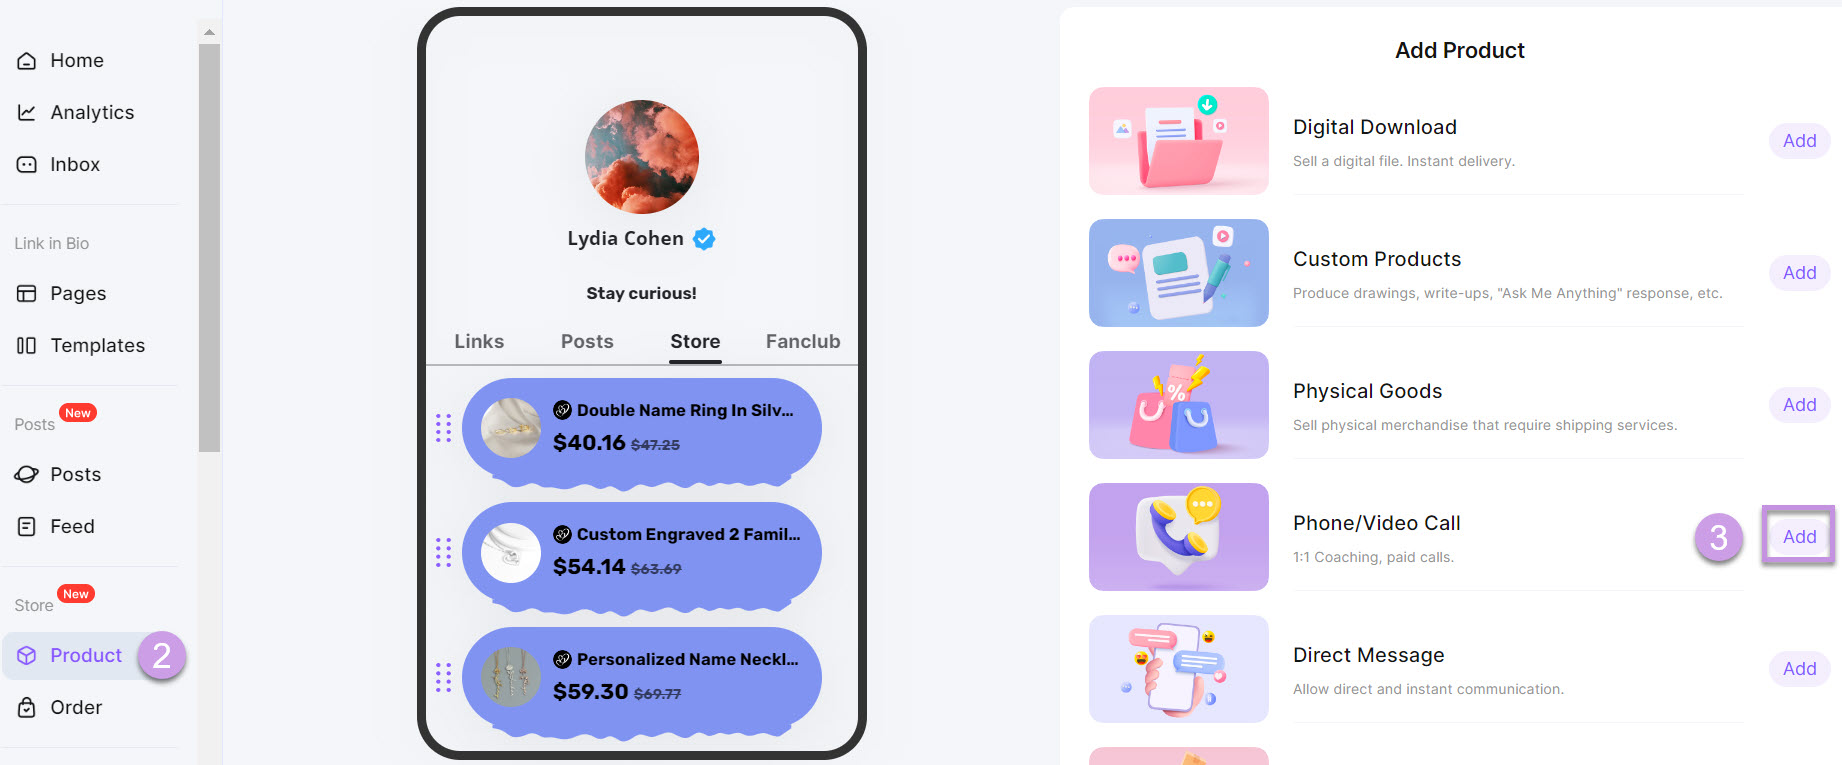
Enter Store > Product > Phone/Video Call:
1. Go to the Linkr website and log in to your Linkr account.
2. Navigate to the “Store” section from the left side of the screen and click “Product”.
3. Click the “Add” button to add a phone or video call.

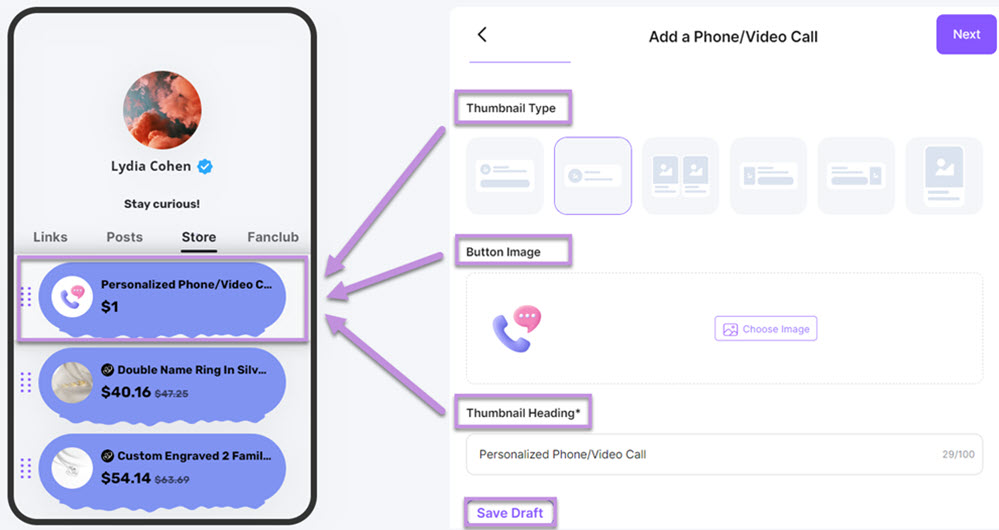
Set the Thumbnail Type:
1. Enter the Thumbnail Type tab. This will generate an item on your product display page.
● Choose a “Thumbnail Type”.
● Add a “Button Image”.
● Set a “Thumbnail Heading”.
2. Click the “Save Draft” button and the product will be displayed in your store.

Edit the Checkout Page:
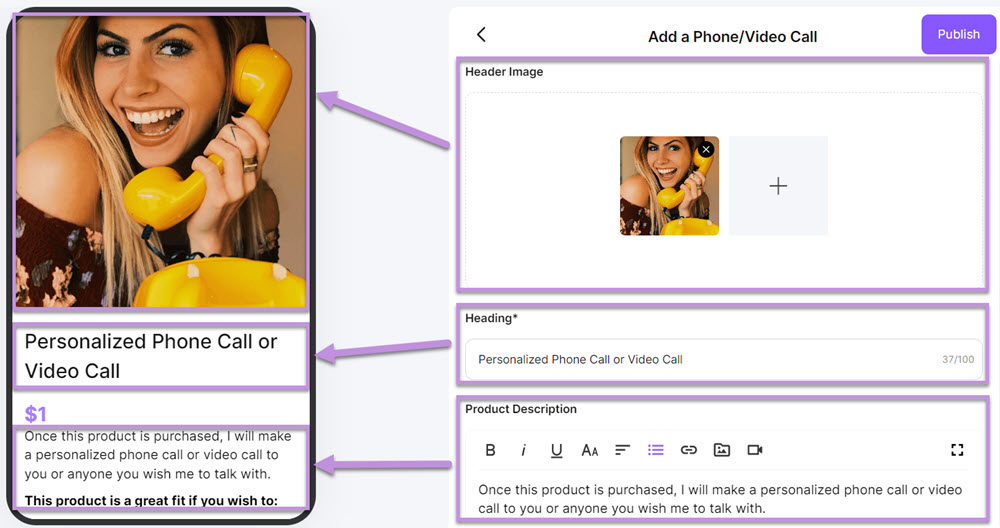
1. Click and enter the Checkout Page, which is the product detail page.
● Add a “Header Image”.
● Set a “Heading”.
● Enter your “Product Description”.

● Set a “Price(USD$)” for your product. Enable the Sales Price for promotion. You can offer a lower price or a discount.
2. Click the “Save Draft” button.

Complete the Advanced setting:
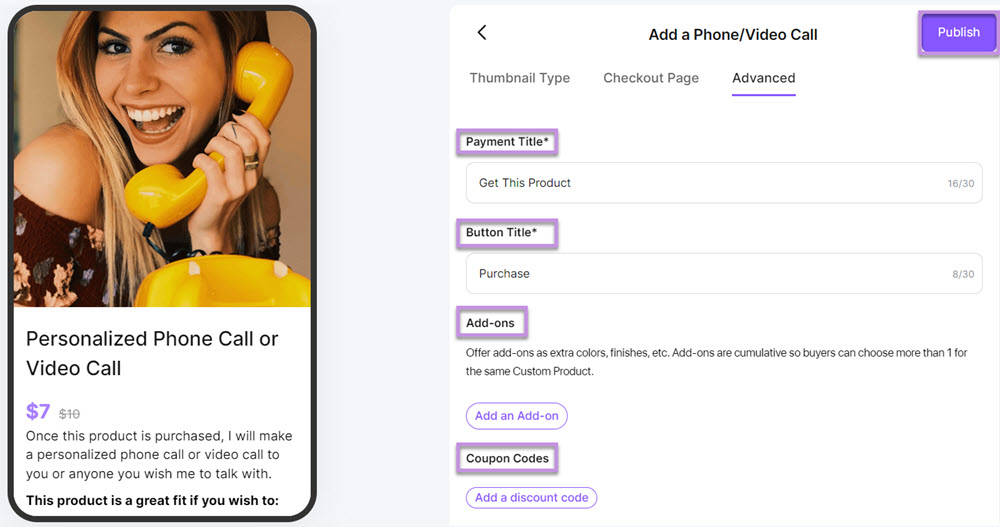
1. Enter the Advanced settings tab. This will be displayed on the payment page of a product.
● Set a “Payment Title”.
● Add a “Button Title”.
● Add an “Add-on”. You can offer add-ons such as extra colors, finishes, etc. Add-ons are cumulative, so buyers can choose more than 1 for the same product.
● Add a “Coupon Code”. Here you can add coupon codes for your customers.
2. Finally, click the “Save Draft” button.
3. After setting up all the settings, click “Publish” to create your product.

