Manage Your Community
This guide is about Linkr Community customization and member management. Get to know how to customize your community and how to manage your club members.
Customize your Community:
1. Go to the Linkr website and log in to your Linkr account.
2. Navigate to the “Community” section from the left side of the screen and click “Community”.
3. Enter the community management page by clicking the club icon and then hit the “…” option.
4. In the “Overview” section, give your community a topic to let your fans know what the club is about. Right here, you can change the name and icon of your Community at any time.
5. Once set up, click the “Save” button.
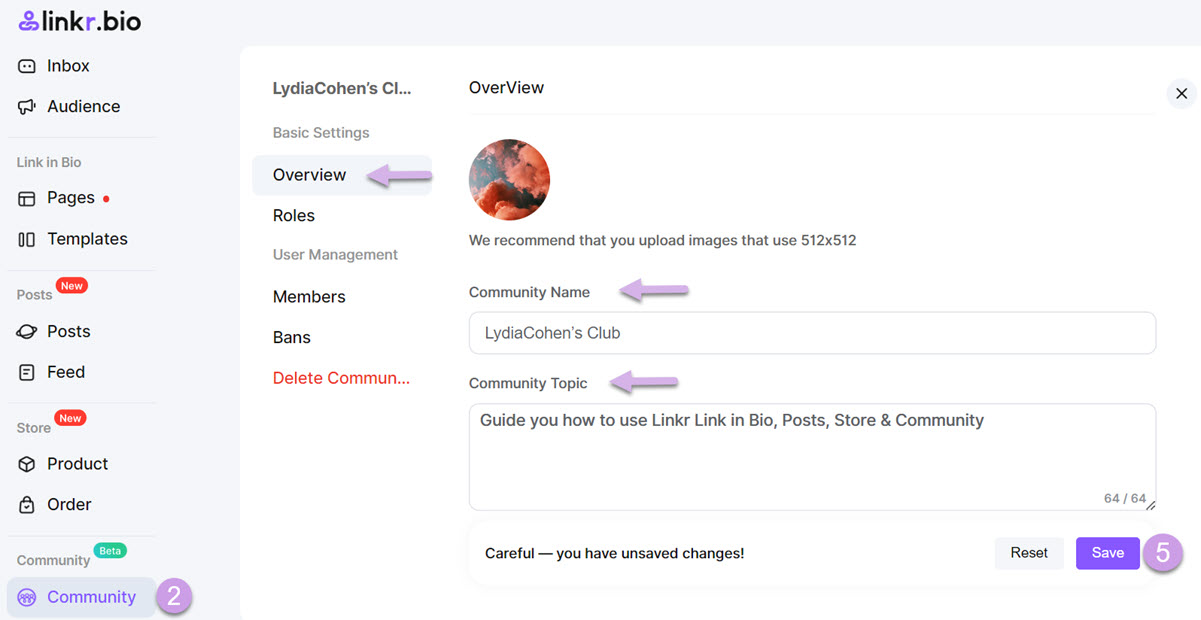
📌 Do remember to add an interesting and easy-to-remember club name and an eye-catching club icon, which is the first step to club success!
Make the most of Roles:
If you have enabled the Linkr membership service (Posts), you will find that your Posts members will be categorized into different roles automatically. The roles can be used to help you conduct community management. For example, you can use them to group your community members, assign permissions, etc.
Of course, you can also create some new roles. Follow the steps here:
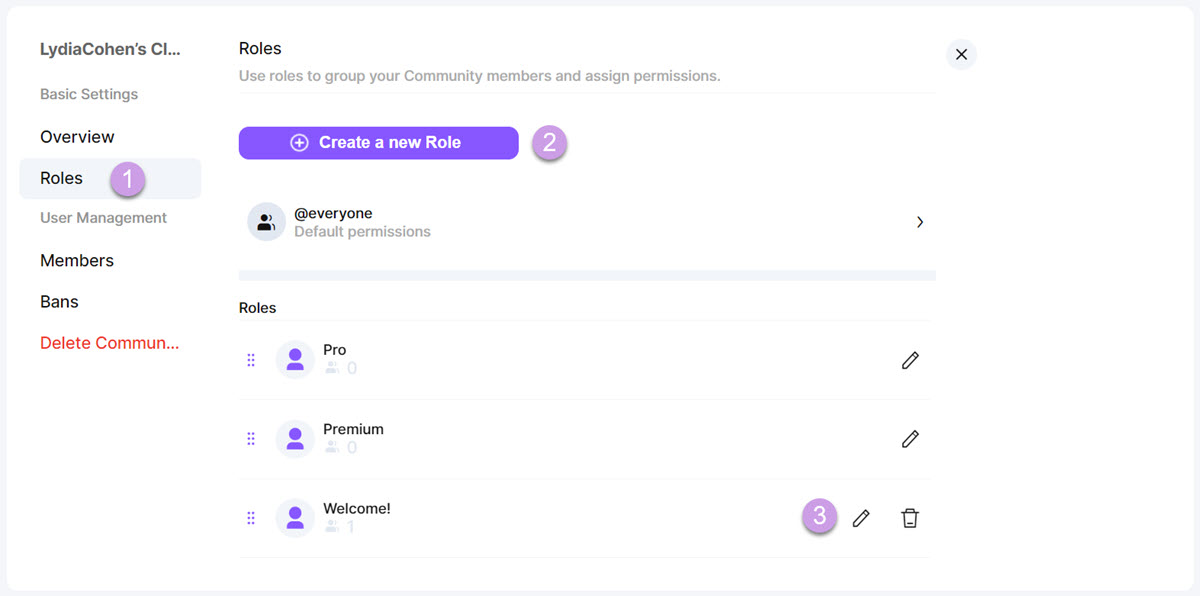
1. Under the “Basic Settings” section, click “Roles”.
2. To create a new role, click the “Create a New Role” button.
3. After you create a new role, it will be displayed in the Roles list. Click the pencil icon to set up the role.
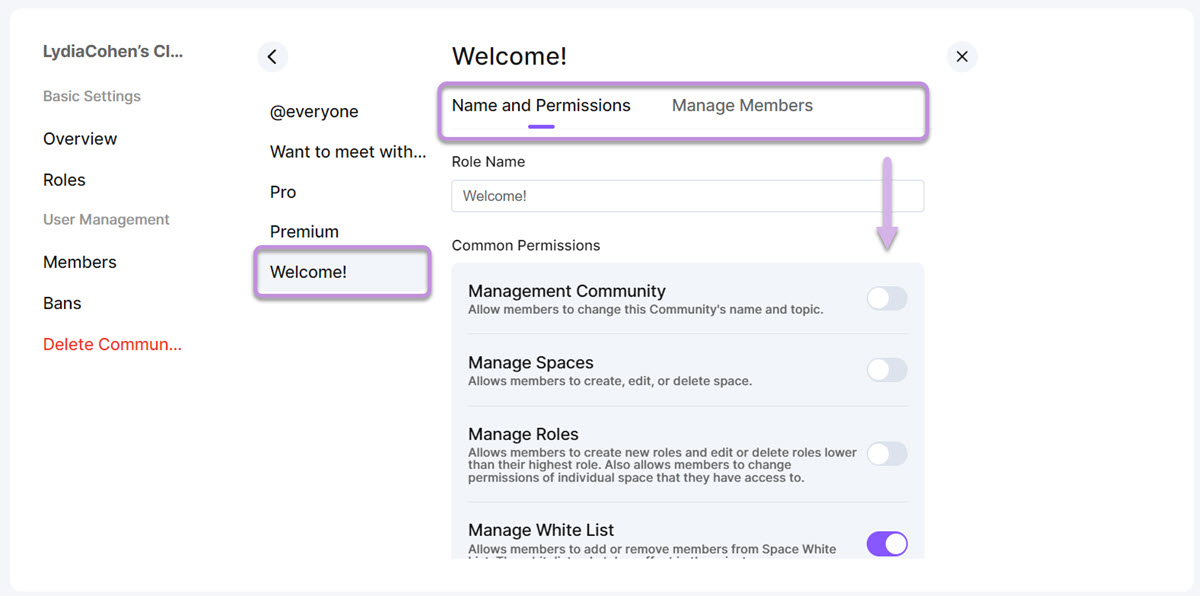
4. You can give the role permission to change this community’s name and topic, invite new people to this community, kick or ban members from this community, send or delete messages in this community, etc.
Kick/Ban members:
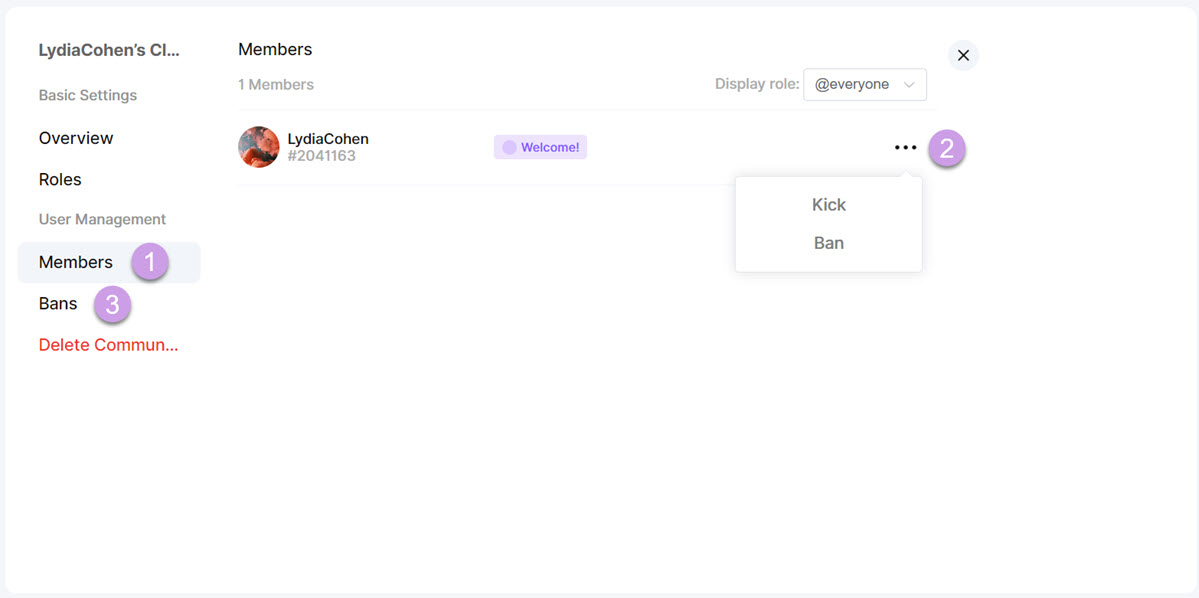
1. Under the “User Management” section, click “Members”. Here you can check your member status, such as number, roles, etc.
2. Click the “…” option, and you’ll be able to “Kick” or “Ban” the members who disobey the club rules.
3. Enter the “Bans” section, and you’ll be able to check the banned members.
Delete a Community:
1. If you want to delete your community, click “Delete Community”.
2. You’ll need to input the community name for confirmation.
3. Then click the “Delete Community” button.
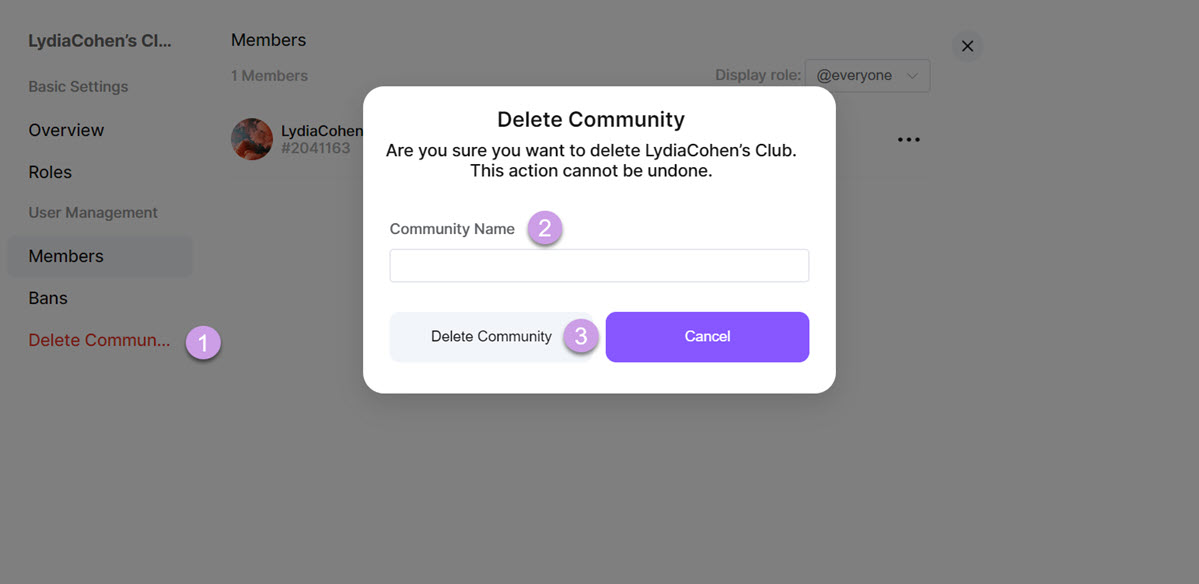
📌 Note that this action can not be undone! Please think twice before you delete your Community.
